A photo taken just before the INSET began.
Follow @mattbritland
On Friday 28th of September we finally launched our iPad trial to all staff. There was only about 3 weeks to organise the event, but the whole thing went very well. Staff left excited, inspired and full of ideas. It really was an outstanding day!
The Build Up
After the summer holidays, I came back to school with the exciting prospect of our iPad trial. However, I realised how much work there was to do. Planning the launch to HoDs as well as organising a whole school INSET was pretty stressful. Luckily, the Asst Head (teaching and learning) was amazing and really helped organise everything. I have talked briefly about the launch to HoDs (2 weeks before the INSET for the whole school) in a previous post, so I will say very little about it here.
I really wanted the INSET to be an event. My idea was based around an Apple style keynote presentation. A few weeks before the INSET I spoke to several members of staff about ideas I had about Apps for T&L. I then asked if they would like to take part in the INSET, by showcasing not only the App, but how it can be used to enhance T&L, inspire and engage students.This would, of course involve speaking infront of the whole school. The teachers I asked jumped at the chance. The idea was to show all staff how other teachers would use the iPad by showcasing inspiring and innovative uses. This is far better than me and the Assistant Head getting up and talking at staff for 4 hours.
Once the speakers were organised I put a schedule together. To stick with the idea of a keynote event, I put together an online flyer using www.smore.com which was sent to all staff. You can see it HERE. I have removed full names.
The event was now organised. Before the INSET, the Assistant Head made some tweaks to the HoD launch presentation and we were almost good to go!
What I have not mentioned yet was how we would display the iPad screen in the theatre, where the INSET was taking place. This was perhaps the part of organising the event that was the most stressful.
My initial idea was to use an Apple TV to mirror the iPads wirelessly to the projector. Annoyingly, the Apple TV and our wireless network did not play nicely together. The IT team at school spent a week and a bit sorting it out, and to my relief they got it to work! Woo hoo! The last thing I wanted was to have the iPad wired to the projector.
What I eventually did was to use my MacBook Pro and the Reflections App to mirror my iPad. It worked slightly better for my needs as I was able to save the Keynote presentations as well as App videos on my Mac in case everything went wrong.
Before the INSET I also talked to our Theatre Manager and got him onboard with the lighting. It was very important to me that the lighting was right. The stage needed to be light, the screen needed to be dark and the audience needed to be atmospheric.
Staff was ready to go, tech was ready to go, I was ready to go.
The day of the INSET.

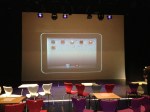
The theatre at 8am. One hour before launch.
The staff taking part in the INSET arrived at 8am and we checked the iPads and other bits of tech worked. Apart from a few hiccups it was fine.
At 9am the rest of the school staff arrived and I was nervous. In fact, I think all those speaking were nervous too.
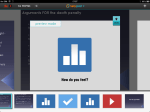
First up was the Assistant Head, who went through the presentation below.
It was a great set up for the rest of the morning. The plenary slide, was obviously used at the end of the morning in the conclusion.
Next up was Tim (Physics), who showcased how he would use SolarWalk and why. Then Amy (History) and Graham went through Timeline: World War 2. A truly awesome App.
Helen (Library) then demonstrated and explained an amazing interactive magazine App that she had created herself using Adobe InDesign. She had used it for open evening and students and parents were blown away by it.
The last person before break was Jason (Music) who went through several creative music Apps. Guest post by Jason coming soon.
Break
The first App we showcased after the break was perhaps one of my favourites. Certainly one I think that can change the way iPads are used in the classroom – NearPod. This was a really interactive and fun session led by Mike (Biology). Everyone in the room were seriously blown away by the session.

Mike demonstrating NearPod.
The last person to showcase some Apps was me. I am not sure how everyone else was feeling but I was pretty nervous.
My session was on non subject specific Apps. Using Blooms Taxonomy of Apps I demonstrated 6 Apps that could be used across the curriculum. It was great to see in the afternoon INSET some teachers using the Apps I had demonstrated. Certainly put a smile on my face.
After my session, Graham concluded the INSET and we spent the last 30 minutes answering questions and talking to departments.
All-in-all an incredible morning.
When I went up to the staffroom for lunch afterwards I saw something amazing…members of staff sat around a table all with iPads, completely ignoring a massive tray of biscuits! Brilliant.
-
-

-
The theatre at 8am. One hour before launch.
-

-
Mike demonstrating NearPod.
-

Thanks:
I wanted to thank Mark Anderson (@ictevangelist) and Daniel Edwards (@syded06) for their advice over the last few months. Cheers fellas.